
Table of Contents
If you’re looking to understand how your website is performing, Google Analytics is the ultimate tool for the job. Whether you’re running a blog, an eCommerce store, a Shopify website, a dynamic website, or a custom-developed site, tracking user behaviour and website performance is essential for growth. Google Analytics 4 (GA4) is the latest version of Google’s web analytics tool, offering new features and more insightful reports than ever before.
In this guide, we will walk you through 9 simple steps to set it up for your website. By the end of this Google Analytics tutorial, you’ll have everything in place to start tracking your website’s traffic and user interactions!
What is Google Analytics 4?
Google Analytics 4 (GA4) is a free tool from Google that helps you track and understand how people use your website and app. It replaces the older version, Universal Analytics, and provides a more modern way to collect and analyse data. Universal Analytics stopped processing data in July 2023, so GA4 is now the version every website uses.
Before GA4, the previous version was called Universal Analytics, which mainly focused on tracking website data. GA4, however, uses an event-based system, allowing for more detailed tracking of actions like clicks, scrolls, and video plays.
What’s New in GA4?
- Tracks both websites and apps in one place.
- Focuses on events like clicks and video plays, not just pageviews.
- Works better with privacy rules like GDPR.
- Uses AI to give smarter insights and predictions.
GA4 is a powerful tool for businesses to understand their audience and improve their online presence.
9 Simple Steps to Set Up Google Analytics for Beginners
Now, let’s dive into the 9 simple steps to set up Google Analytics 4 for beginners.
Step 1: Go to Google Analytics
To begin using Google Analytics 4, the first step is to create a Google Analytics account. The process will be quick and easy if you already have a Google account.
1. Go to the Google Analytics website.
2. Click on Start Measuring to get started with the account setup.
Step 2: Set Up an Account
1. On the Account Setup page, enter an Account Name. This is typically the name of your business or website.
2. In the Account Data Sharing Settings section, you can select or deselect options based on your privacy preferences (these allow Google to use some data to improve their services).
3. Click Next to proceed to the next step.
Step 3: Set Up a Property
1. On the Property Setup page, enter the Property Name. This is usually the name of your website or app.
Note: Make sure to choose a clear and descriptive property name that includes your primary domain name. This will make it easier to identify and manage, especially when configuring cross-domain tracking or managing multiple domains and apps under the same property. A well-structured name simplifies navigation and ensures consistency in your analytics setup.
2. Set your Reporting Time Zone and Currency to match your business location and preferred currency for reporting.
Note: Make sure you use correct time zone and currency that matches your demographics.
3. Click Next to continue.
Step 4: Configure Business Information
1. In the Business Information section, select your Industry Category from the dropdown menu.
2. Choose your Business Size to provide Google with a rough idea of your company size.
3. Click Next to finalise this step.
Step 5: Set Up Business Objective
1. In the Choose your Business Objectives section, select the topics most important to you.
2. Then, click on Create to set your objective.
Now, a message box will pop-up to Accept the Google Analytics Terms of Service Agreement. Read the Terms of Service Agreement and Data Processing Amendment.
3. Check the box to confirm that you agree to the terms.
4. Click I Accept to proceed.
Step 6: Set Up a Data Stream
1. After accepting the terms, you’ll be directed to the Data Streams setup page.
2. Click Web (for a website), or choose any platform that you would like to analyse.
3. Then enter your Website URL (e.g., https://www.example.com) and Stream Name (e.g., “Website Stream”).
4. Click Create and continue in the top right corner to generate your Measurement ID (a code starting with “G-”).
Step 7: Install the Google Analytics Tag on Your Website
There are three ways to add the Google tag to your site: through Google Tag Manager (recommended, and shown below), by pasting the code into your website yourself, or with your platform’s built-in integration, such as Site Kit on WordPress or the Google & YouTube app on Shopify.
1. After creating the data stream, you’ll see the Web Stream Details page with your Measurement ID.
2. To see your install options, click View tag instructions.
3. To paste the code yourself, select Install manually, copy the Google tag (gtag.js) snippet and paste it right after the <head> tag on every page. If you use Tag Manager, you only need the Measurement ID, so continue with the next step.
4. To use Tag Manager (recommended), go to Google Tag Manager and sign in.
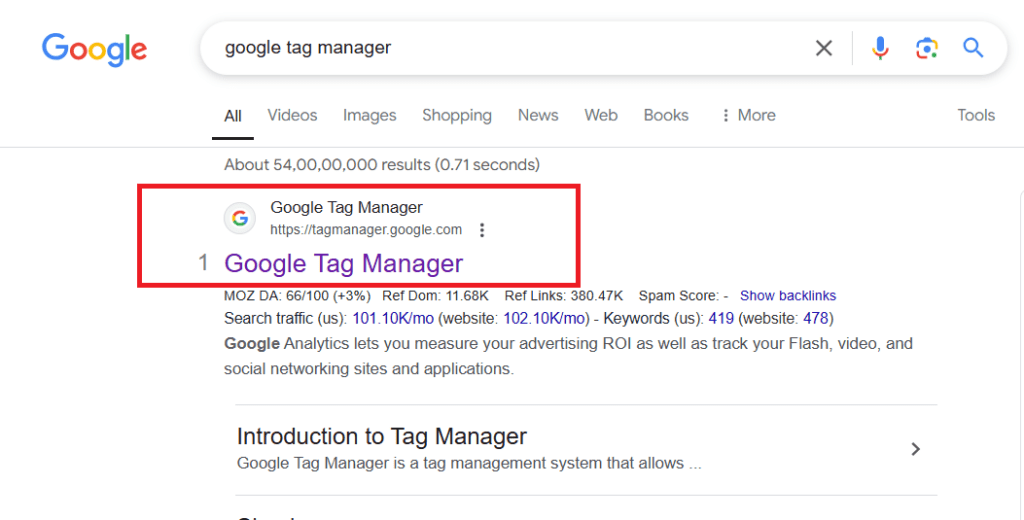
5. Create a new Account name, choose your Country, enter the URL of your website and Select Create
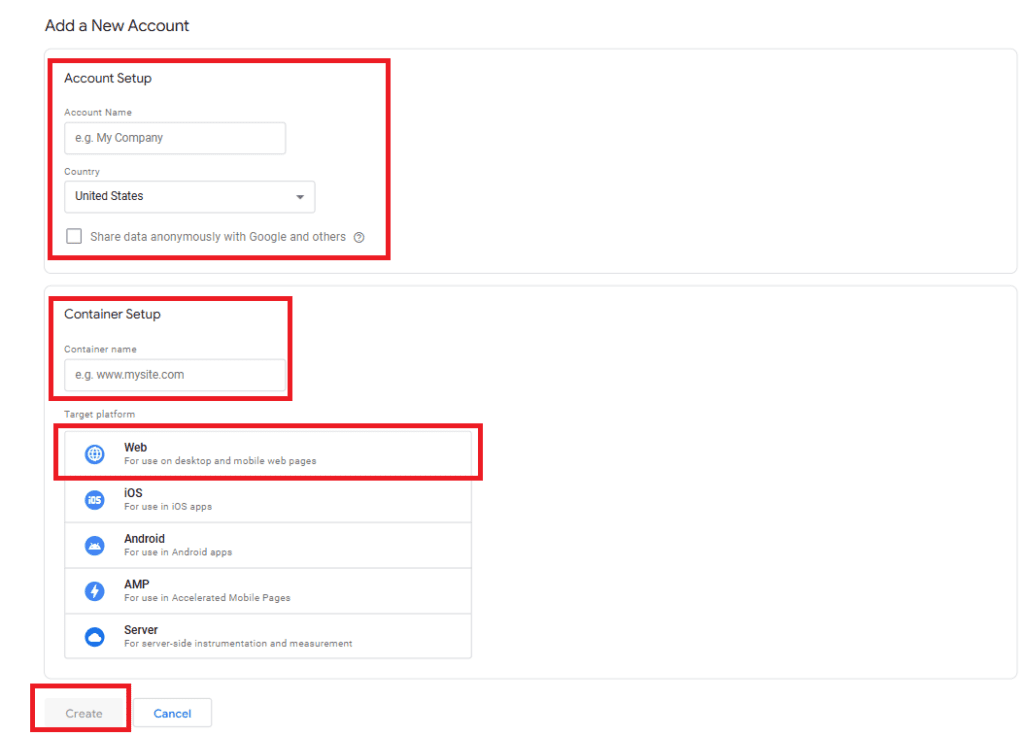
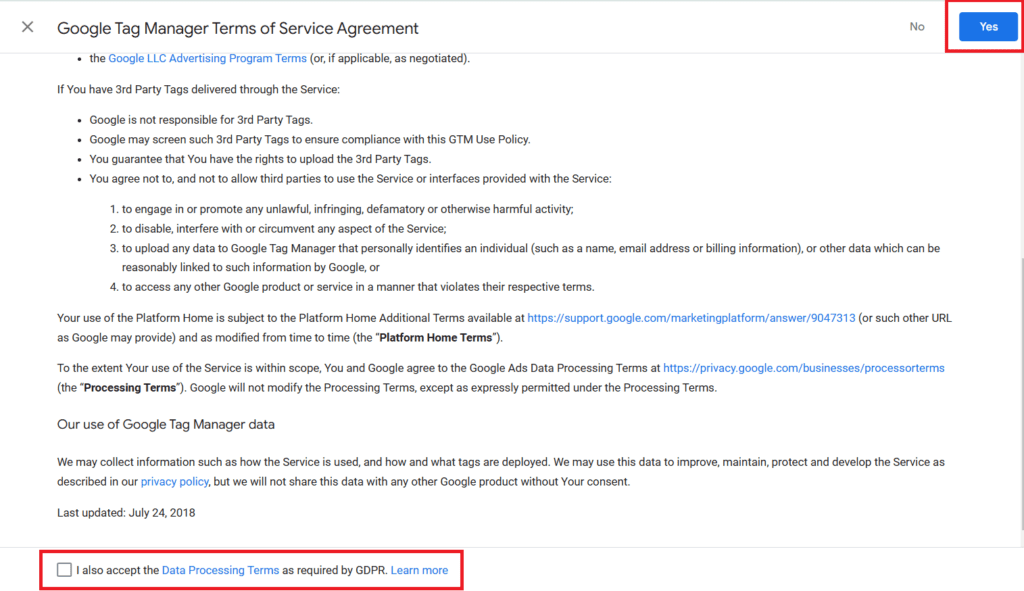
6. Click Create, and the Tag Manager Screen Agreement Form will appear.
7. Click Yes and check the box next to “I also accept your data processing,” and your account will be formed.
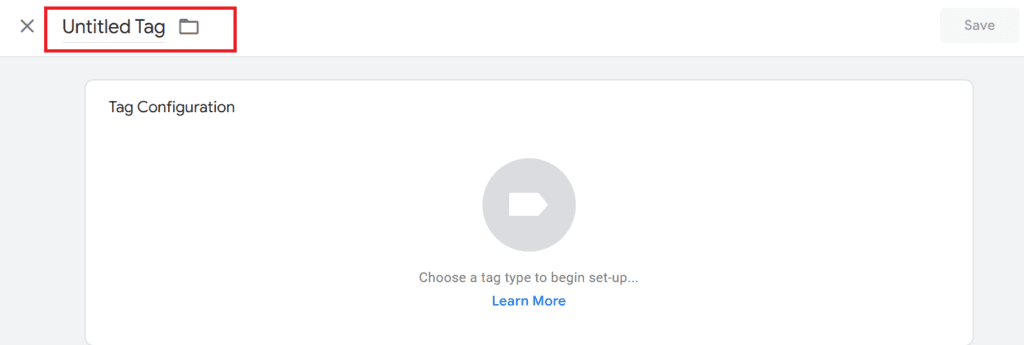
8. And then click on New Tag, and give a title for this.
( Eg. GA4 tag)
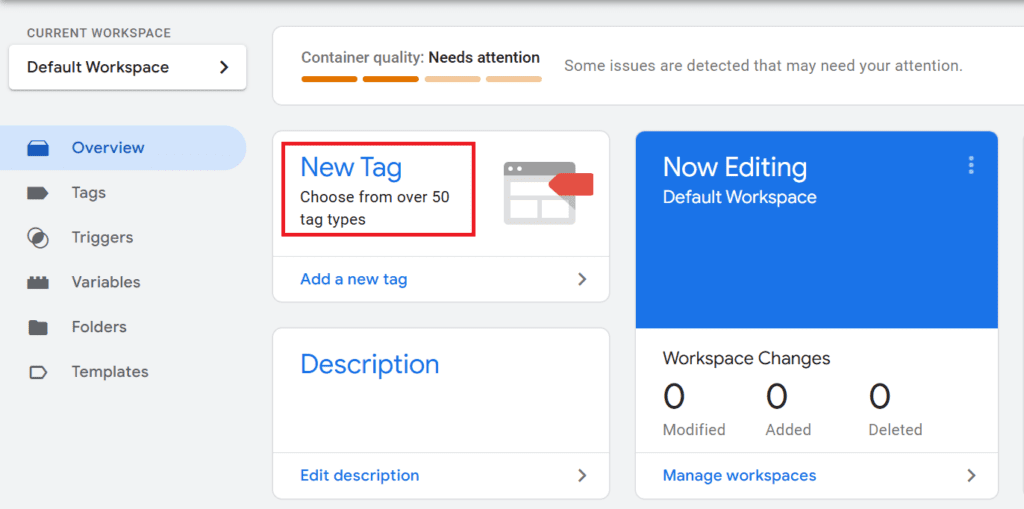
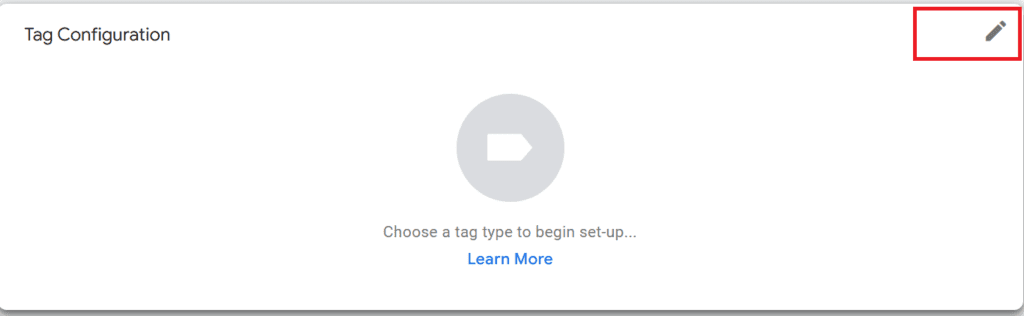
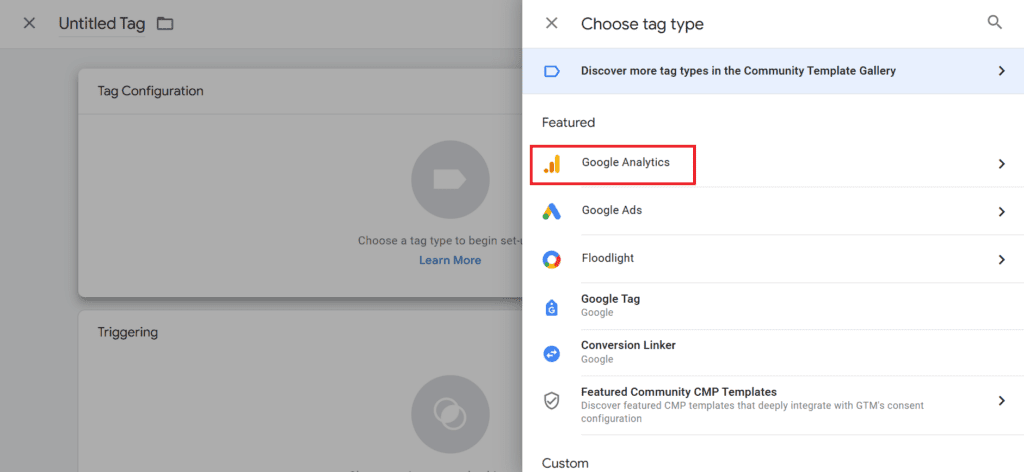
9. Click the Pencil icon in the right corner and select Google Tag.
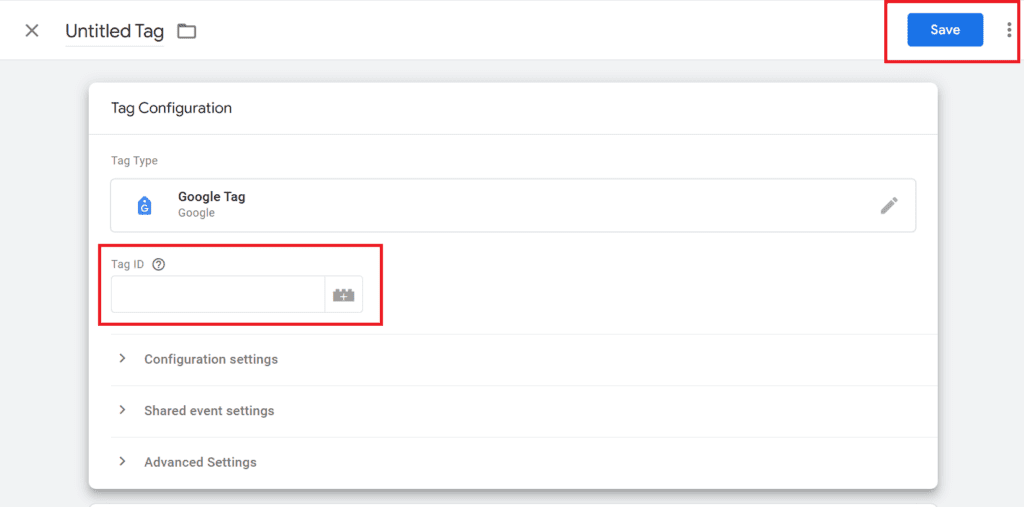
10. You can find a space to add Tag ID, now paste the GA-4 Measurement ID and Click Save.
11. Scroll down to find the triggering section, their click on the Pencil Icon.
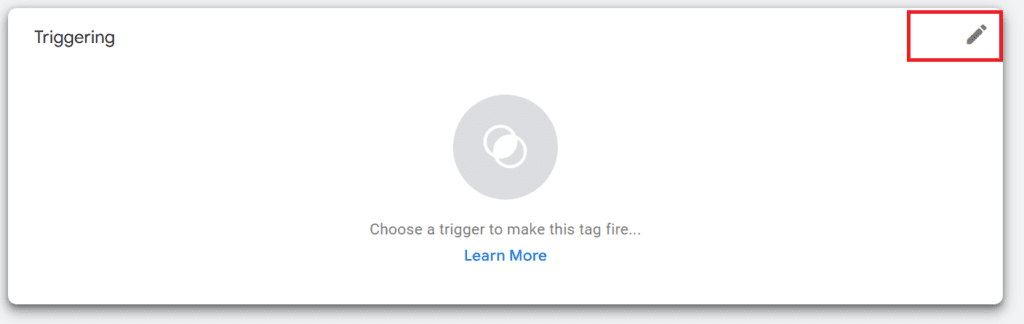
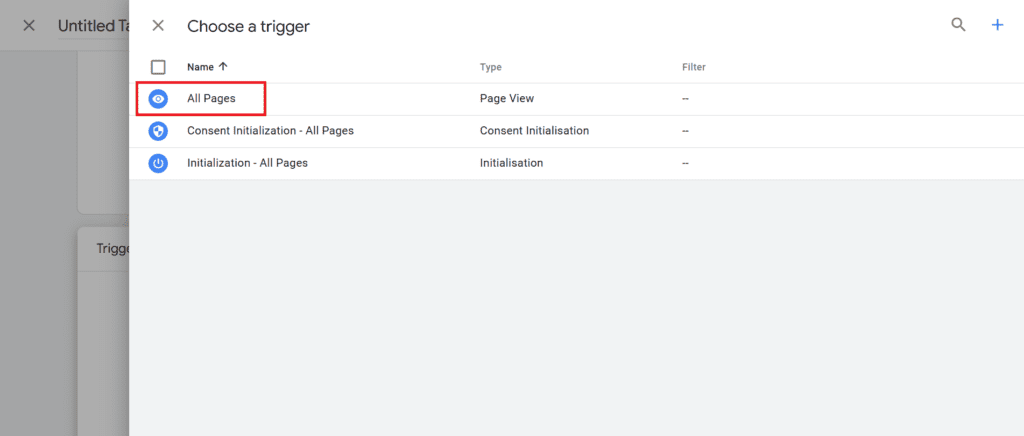
12. Select Initialization - All Pages (or All Pages), click Save, then click Submit and Publish so the tag goes live.
If this is a new Tag Manager container, its two code snippets also need to be on your website. Tag Manager shows them when you create the container, and our guide on installing the Google tag through Tag Manager walks through it.
Wait for 24 hours to get your complete data and analytics.
Step 8: Verify Data Collection in Real-Time Reports
1. Return to Google Analytics and click on Reports.
2. Open Real-Time overview to check if data is flowing in.
3. Visit your website in another tab or window and refresh the page.
If tracking is set up correctly, you should see your activity on the Real-Time report, confirming that data collection is working.
Step 9: Enable Enhanced Measurement (Optional but Recommended)
1. Go to Admin > Data collection and modification > Data streams and click on your stream.
2. In the Enhanced Measurement section, Toggle it on if it isn’t already.
This automatically tracks events like page views, scrolls, outbound clicks, and more, without needing additional code.
After Setup: Settings Most Businesses Miss
The nine steps get data flowing. These settings make that data useful:
- Mark your key events. Form submissions, call clicks, WhatsApp clicks and purchases are what matter to your business. Mark them as key events (GA4’s name for conversions) under Admin > Data display > Events. Our guide to tracking phone calls in GA4 shows a full example.
- Keep data for 14 months. GA4 keeps detailed event data for 2 months by default. Change it under Admin > Data collection and modification > Data retention.
- Link Search Console and Google Ads. Under Admin > Product links, so you can see search queries and ad performance next to your site data. See connecting Google Ads and GA4.
- Filter out your own visits. Define your office IP as internal traffic in the data stream’s tag settings, then turn on the internal traffic filter under Admin > Data filters.
- Set up consent. If you have visitors from the EU or UK, use a cookie consent banner with Google Consent Mode, so your data and ads stay compliant.
Our Google Analytics and Tag Manager Guides
This guide is the starting point for our analytics content. Go deeper on any topic:
- Understanding analytics: Google Analytics benefits and limitations, why every business needs it, the role of analytics in digital marketing and using analytics to plan your strategy.
- Google Tag Manager: what Tag Manager is, installing the Google tag and fixing the “Google tag should have been loaded” warning.
- Tracking what matters: phone call tracking, campaign tracking with UTM links and Google Ads conversions.
- Search data: Google Search Console.
Want it set up properly the first time? We configure GA4, Tag Manager and lead tracking as part of our performance marketing work.
Conclusion
Setting up Google Analytics 4 for beginners is essential for anyone looking to track website performance and gain deeper insights into their audience’s behaviour. By following these 9 simple steps — creating a Google Analytics 4 account, setting up a property, adding the tracking code, setting up events, and exploring reports — you can get started with Google Analytics 4 and begin using it to make data-driven decisions for your website or business.
With Google Analytics 4’s advanced features, you’ll be able to track website traffic, user actions, and conversions in a much more granular way than before.
At Wonkrew, we use Google Analytics and other powerful digital tools to maximise results for our clients, offering guidance and expertise tailored to your unique goals. Ready to take your website analytics to the next level? Reach out to Wonkrew, that empowers your success through smart insights and data-driven strategies.