Table of Contents
If you’ve ever wondered how to install the Google Tag through Google Tag Manager, you’re in the right place. Setting up the Google Tag is an essential step for tracking website performance, user behavior, and conversions. At Wonkrew, the best digital marketing agency in Chennai, we’ve helped countless businesses simplify this process, and today, we’re sharing this guide so you can do it yourself.
Whether you’re new to Google Tag Manager or looking to refine your skills, this guide will walk you through every step in a simple, conversational way. Grab a coffee, and let’s dive in!
What is Google Tag Manager?
Before we get started, let’s clarify what Google Tag Manager (GTM) does. GTM is a free tool from Google that helps you manage and deploy tags (small snippets of code) on your website without needing a developer. These tags can track things like button clicks, page views, and user interactions.
In simple terms, GTM acts like a container for all your tracking codes, making it easier to organize and update them without touching your website’s code every time.
Why Use Google Tag Manager to Install the Google Tag?
You might be asking, Why not just add the Google Tag directly to my website? Good question! Using GTM makes your life easier because:
- No coding expertise required: You can add, update, or remove tags without bothering your developer.
- Centralized control: Manage all your tracking codes in one place.
- Flexibility: Quickly adapt your tags to new marketing strategies.
Now that we understand the basics, let’s get into how to set up Google Tag through Tag Manager.
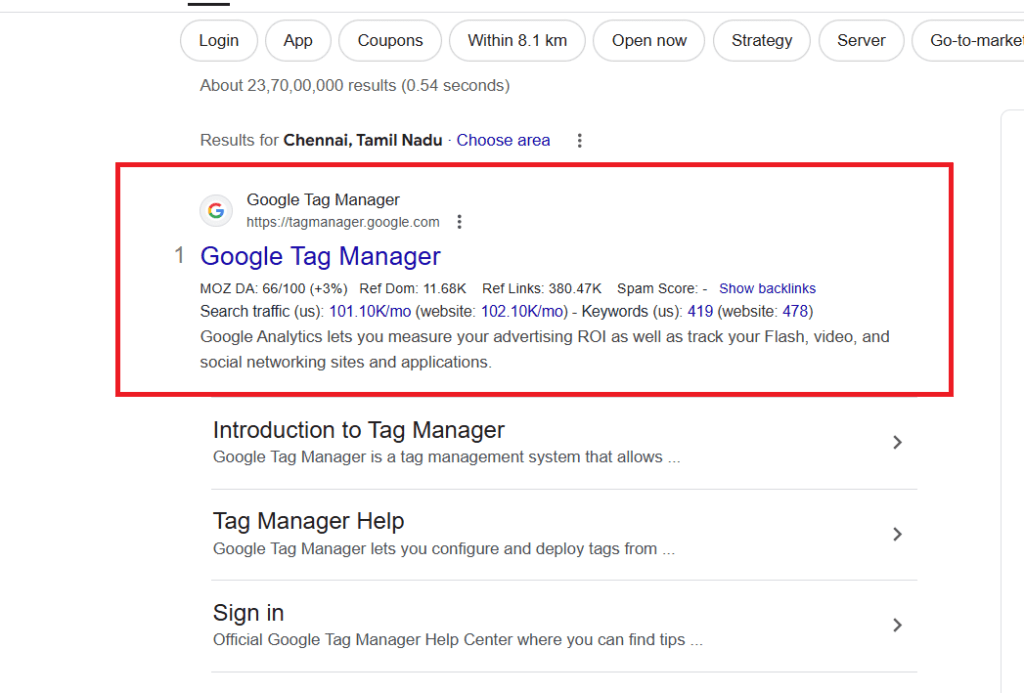
Step 1: Create a Google Tag Manager Account
To begin, you’ll need a GTM account. If you already have one, skip to the next step. If not:
- Visit the Google Tag Manager Login page.
- Click Create Account and fill in your account details.

- Name your container (usually your website’s domain) and select the target platform (Web, iOS, Android, or AMP).
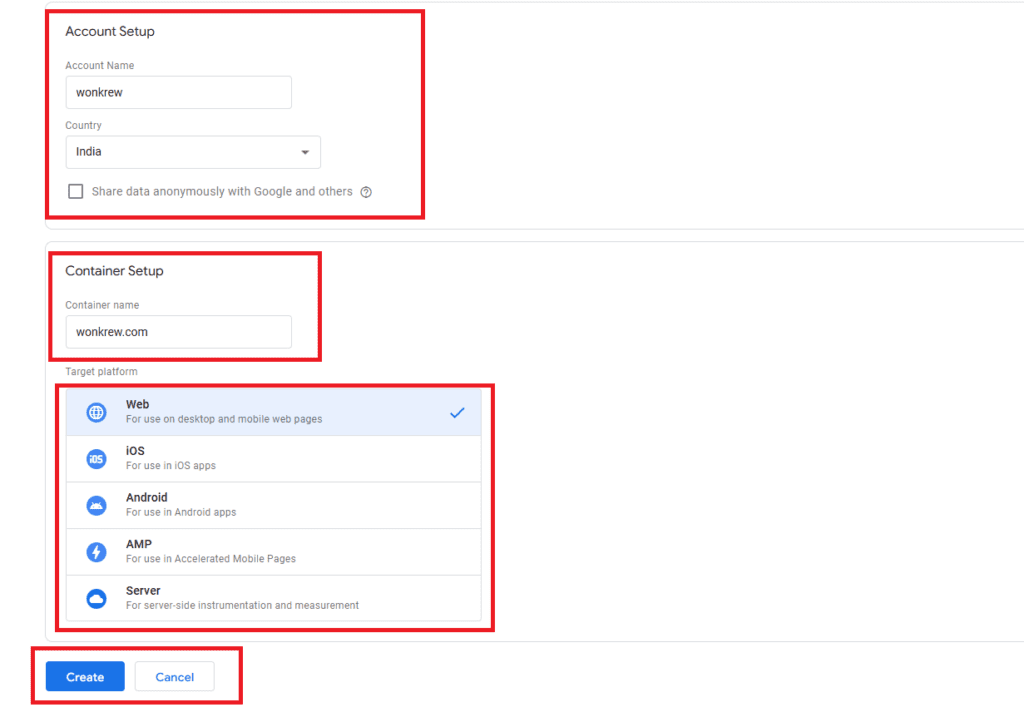
Once done, Google will generate the GTM container code. Save it—you’ll need it in the next step.
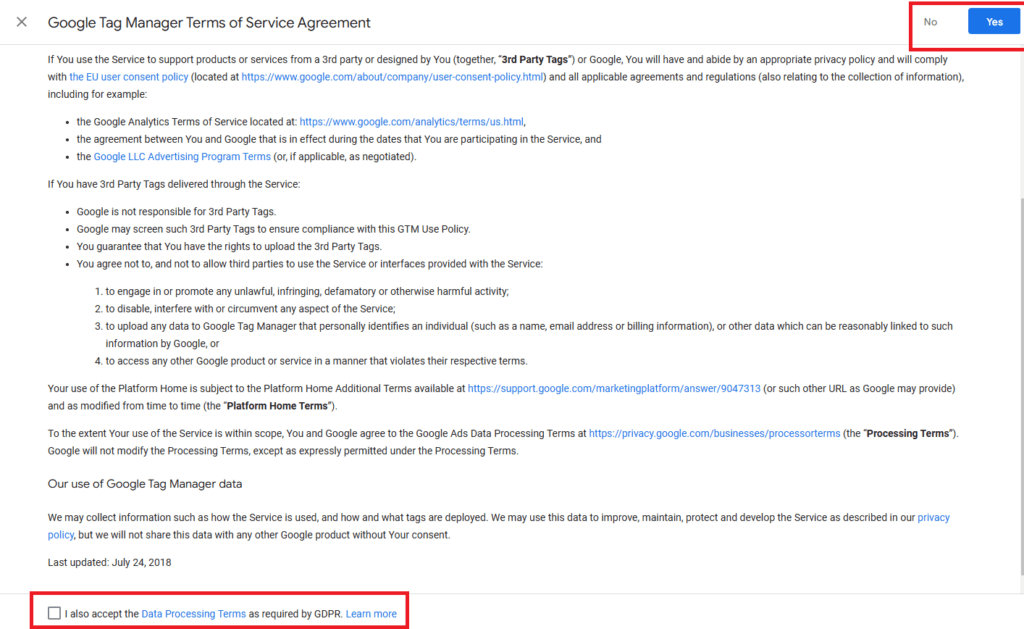
Step 2: Add the Google Tag Manager Code to Your Website
Now that you have the GTM container code, you need to add it to your website. Here’s how:
- Copy the container code: Google provides two pieces of code—one for the <head> section and another for the <body> section of your website.
- Paste the code: Open your website’s HTML file and:
- Paste the first snippet inside the <head> tag.
- Paste the second snippet right after the opening <body> tag.
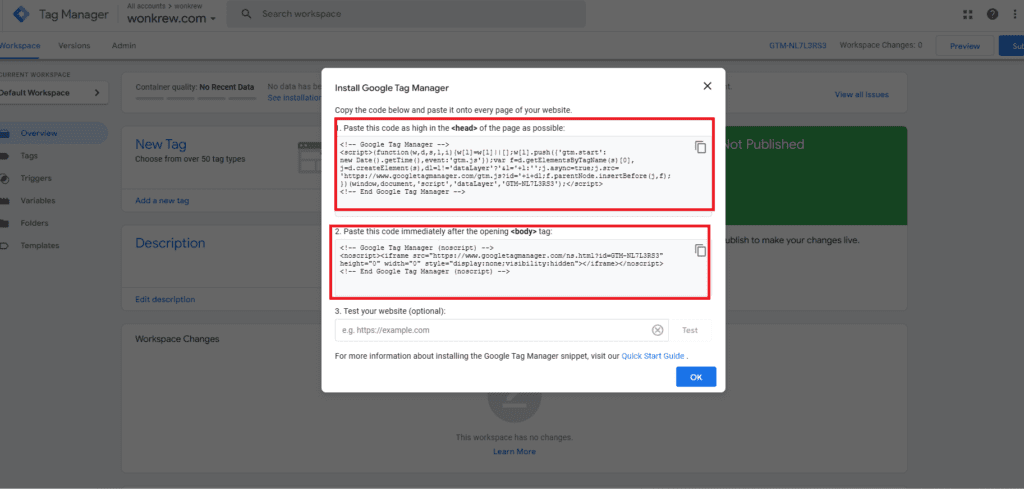
If you’re unsure where to paste the Google Tag Manager code, reach out to your developer or use a CMS like WordPress, where you can add the code in the theme settings.
Step 3: Create a New Tag in Google Tag Manager
Here’s the fun part: creating your first tag. This is where you’ll add the Google Tag.
- Log in to your GTM account.
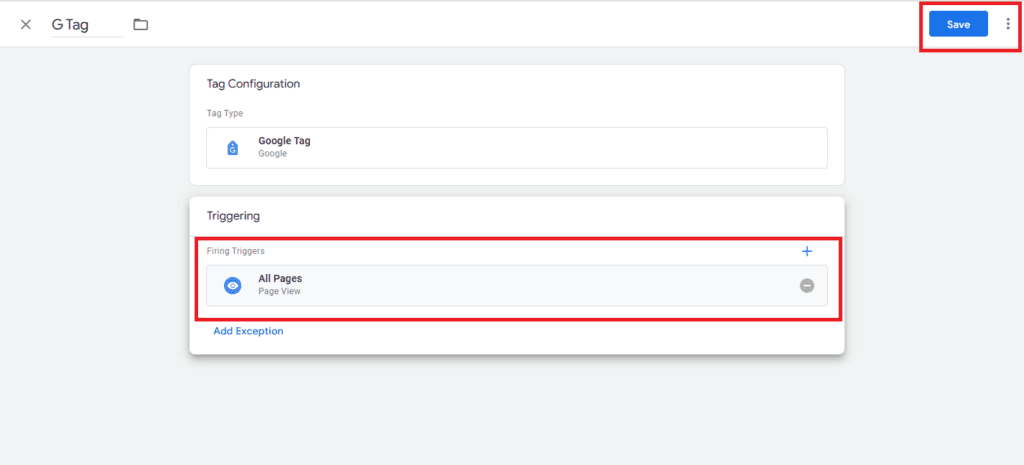
- Click on Add a New Tag and Give a Name for the Tag
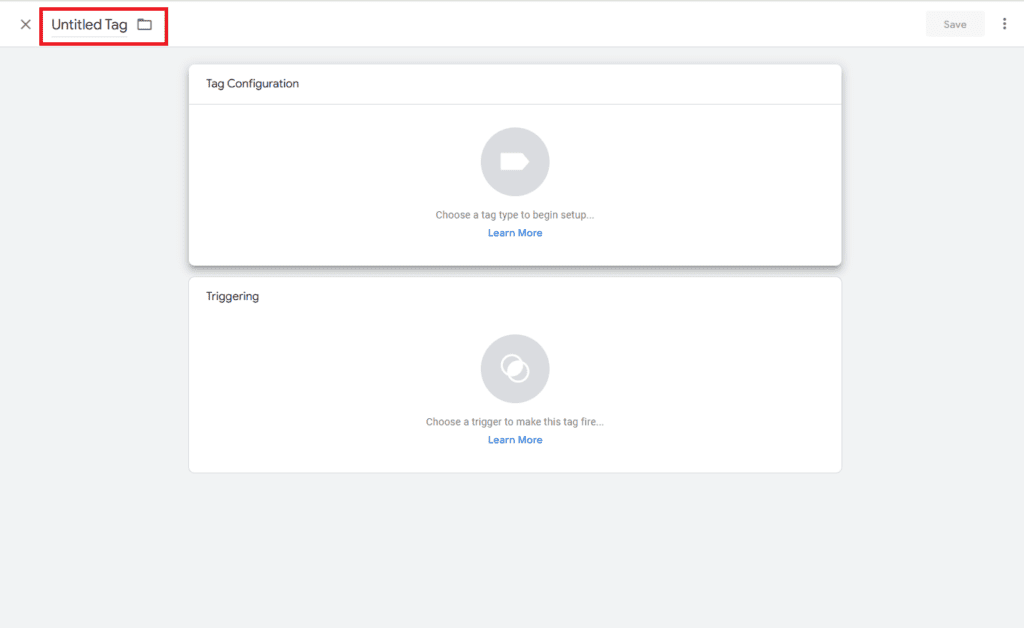
- In the configuration window:
- Select Tag Configuration and choose Google Analytics: GA4 Configuration (or Universal Analytics, depending on what you’re using).

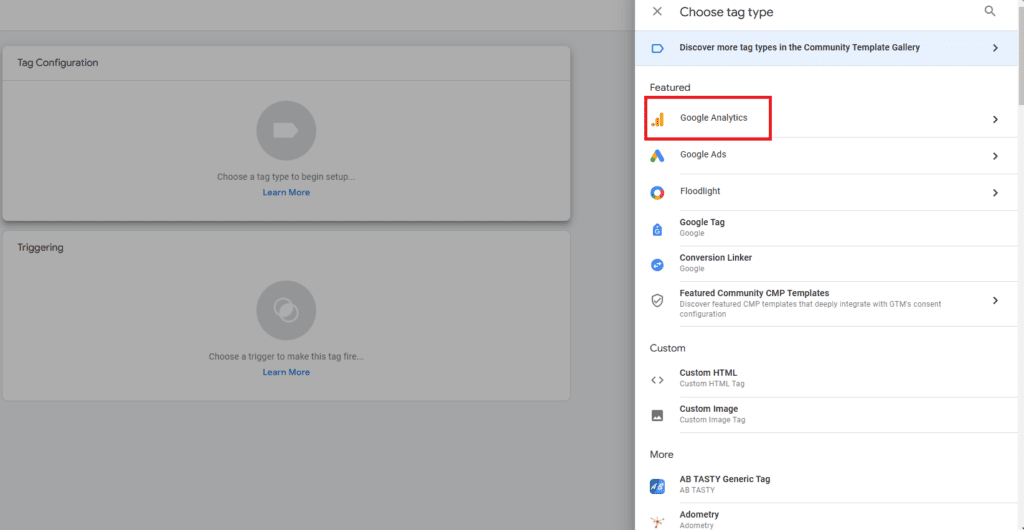
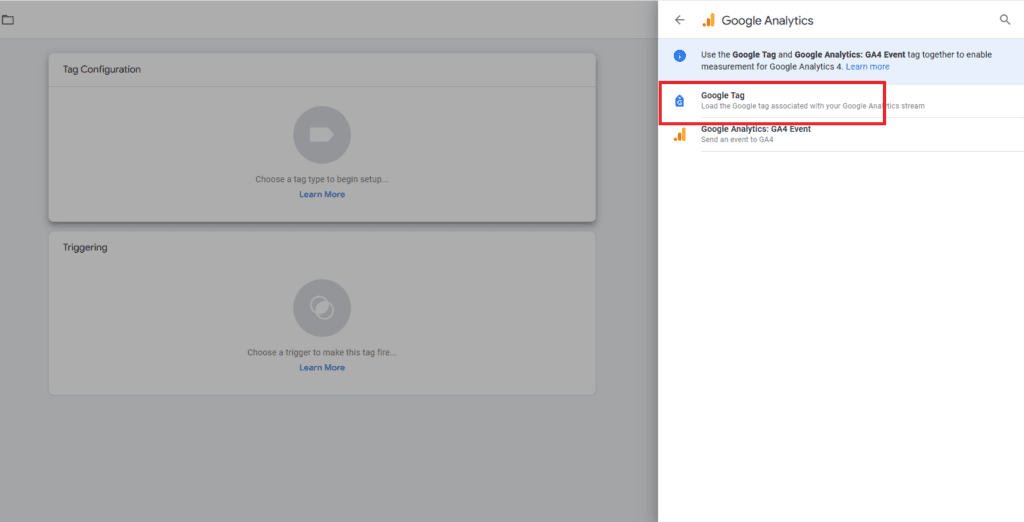
- Enter your measurement ID and Click triggering and Select All Pages.
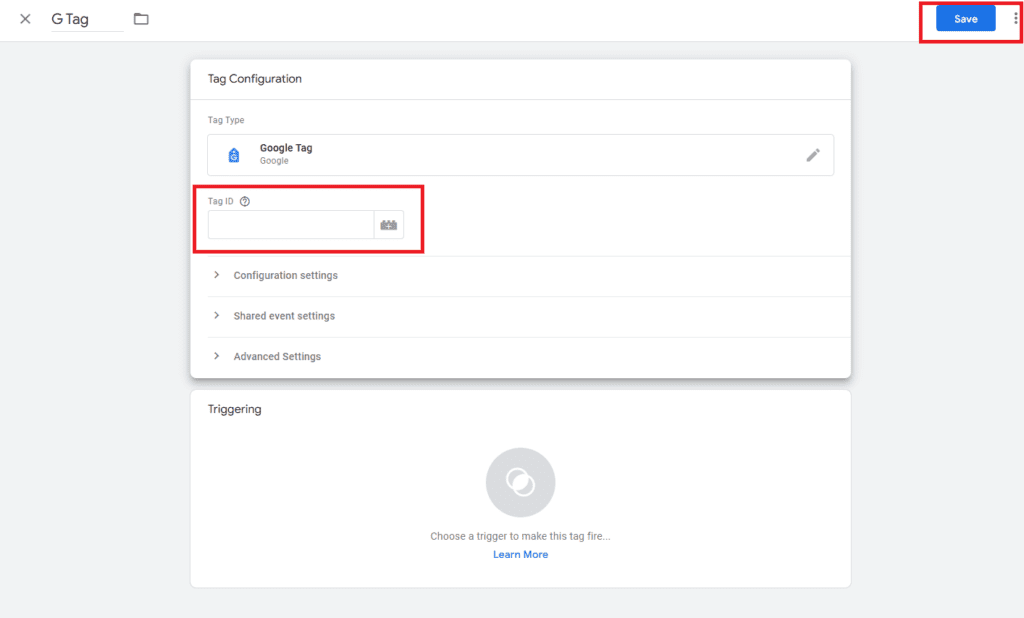


Step 4: Publish Your Tag
Once your tag is ready, it’s time to publish it:
- Click on the Submit button in GTM.
- Add a version name and description (e.g., “Google Tag Setup”).
- Hit Publish to make the tag live on your website.
And that’s it! You’ve just learned how to set up the Google Tag through Tag Manager.
Step 5: Verify Your Tag Using Google Tag Assistant
It’s always a good idea to check if everything is working as expected. For this, you can use the Google Tag Assistant.
- Open your website in a Chrome browser.
- Enable the Tag Assistant extension.
- Reload your website to see if the tags are firing correctly.
If you see your tag listed with a green checkmark, congratulations! Your setup is complete.
Real-Life Example: Why This Matters
Imagine you’re running a campaign to increase eCommerce sales. You want to know:
- Which product pages get the most traffic.
- How many users add items to their cart but don’t check out.
- What percentage of users complete a purchase.
By setting up the Google Tag through GTM, you can track all this data without manually coding each page. This helps you make data-driven decisions to improve your website and boost sales.
Why Choose Wonkrew for Your Digital Marketing Needs?
At Wonkrew, we’ve helped businesses of all sizes use Google Tag Manager to streamline their tracking and analytics. We specialize in ROI-driven strategies that deliver measurable results. Whether you’re setting up your first Google Tag or need advanced analytics, we’re here to help.
Conclusion
Setting up the Google Tag through Tag Manager might seem technical at first, but with this guide, you can do it confidently. Remember, GTM simplifies the process, giving you the flexibility to track what matters most to your business.
If you have questions or need expert help, reach out to us at Wonkrew, the best digital marketing agency in Chennai. We’re just a message away!
Frequently Asked Questions (FAQ’s)
1. How do I create a Google Tag Manager?
Visit Google Tag Manager, click Create Account, fill in account details, name your container, select the platform, and save the generated container code.
2. How do I add Google Tag Manager to my site?
Copy the GTM container code, paste the first snippet in your website’s <head> tag and the second snippet immediately after the <body> tag. Save and publish changes.
3. What is Google Tag Manager used for?
Google Tag Manager simplifies managing and deploying tracking tags (e.g., Google Analytics, Facebook Pixel) on your website without directly editing its code, offering centralized and efficient control.
4. Is Google Tag Manager free?
Yes, Google Tag Manager is completely free, making it an accessible tool for businesses to manage tags and enhance tracking without additional costs.
5. How do I add a user to Google Tag Manager?
Log in to GTM, go to Admin, select Account Settings, click Add User, enter their email, assign permissions, and save to grant them access.

